
Designing an App with Layerz
A tour of how a Layerz project fits together, from screen design through data and behavior. What you build is iOS native the whole way down.
Layerz is a tool for designing and prototyping apps. It's built for iPad, and it works the same way on iPhone and Mac.
Everything — from laying out a screen to the details underneath — runs as iOS native. What you're building is what ships. To keep that true on the Mac, Layerz runs there as a Mac Catalyst app.
It's on the App Store as Layerz App Designer, and every feature is free to use while you build.
What can you do with what you make?
Worth settling before anything else. Once you've built something in Layerz, there are three ways out:
- Use it yourself — Preview runs your app from the editor at any time. On iPad and Mac there's also Run, which opens it in a separate window as a fully independent app.
- Share it — Layerz is a document app. Hand someone the file; if they have Layerz installed, it runs.
- Ship it — We publish an Xcode project that turns a Layerz file into an app. Download it, drop your file in, set the bundle ID and your developer settings, and you can distribute it like any other app. → github.com/layerzapp/LayerzX
The main screen
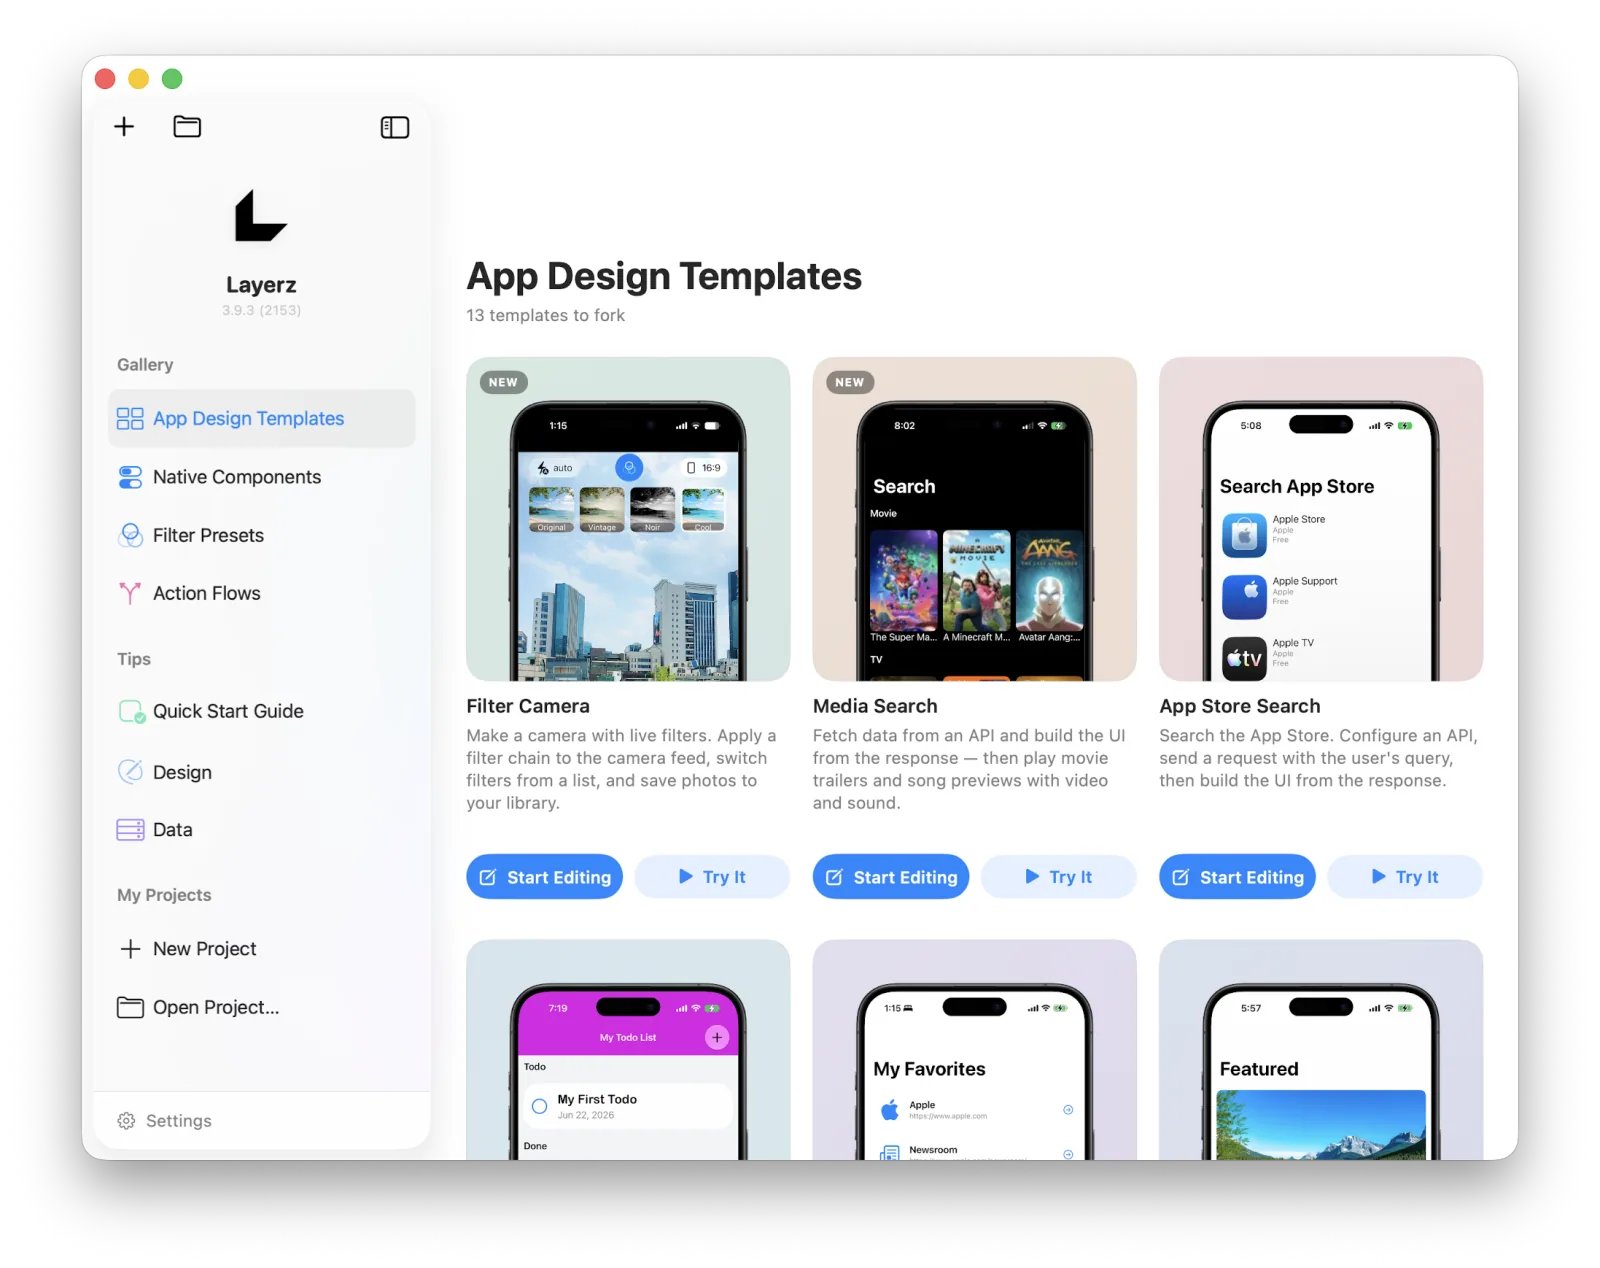
Install the app and the main screen is what you get. The editor isn't open yet — this screen is about the material you build with. Because Layerz is a document app, opening a project file from Finder takes you straight into the editor.
The Template list shows what you can build, and each one runs immediately or opens straight into editing.
The App Design Templates listBelow that are explanations of the components and Action Flows available to you — a section we'll keep adding to. At the very bottom is where you start a new project or open an existing one.
 Native components, explained on the main screen
Starting a project
From here on I'll describe the Mac version. iPad works almost identically, and iPhone differs slightly because the screen is smaller — but the concepts are the same. Get comfortable on one and you can work on any of them.
The quickest way to see how a project is put together is to pick a template and choose Start Editing. To explain the concepts first, though, we'll start empty.
At the bottom of the main screen's menu, Start for Free opens the new project panel. Name it, choose Empty Project, and press Create. If you've upgraded to Layerz Pro you'll see New Project instead, which also lets you choose where the file is saved.
 The new project panel
The project opens on an overview of the app, with buttons down the left for each part of it.
 The overview of a new project
Here's what each of those does.
App Info
Set the app icon, and write down what the app is in the Description.
As you build, the designs, data, and actions pile up. App Info is where you can see all of it at once.
Screens
Everything about designing the app happens here. The unit is a Screen — one screenful on an iPhone.
Open the Screens tab and you get one empty Screen. Among the tools along the bottom, the second one — + add — opens the list of components you can put on it. (There's no add button on the Mac; the panel on the left stays open instead, for technical reasons in Mac Catalyst.)
 The component library
Drag any component from there onto the Screen. As you drag, Layerz previews where it will land and shows the coordinates.
Those coordinates aren't a distance from the origin. Move the component around and you'll see the reference point keep changing depending on where it is.
This is Auto Layout, the defining thing about designing in Layerz. A component gets the layout that makes the most sense for where you dropped it.
The short version: a component near the left is positioned from the left, one near the right from the right, and one in the middle is centered. Once that's decided, the component stays where you meant it to be even when the Screen size changes.
The reference doesn't have to be the parent view — it can be another view beside it. Drag a second component in near the first and you'll see its position measured against that first component. Put it below, and it now moves along with the one above it. Select the original and drag it somewhere else to watch that happen; Auto Layout will make sense immediately.
Auto Layout is decided for you on the way in, but of course you can edit it — that is, change what a component is measured against.
Select a component and you'll find an unfamiliar anchor handle in the middle of it. Drag that handle to another component and a menu appears asking what kind of relationship you want. Pick one.
Selecting a component on a Screen also fills the inspector on the right. What's in there depends on the kind of component, so it's worth poking at a few; color and font are the basics.
Some inspector rows have an orange + button. That's data binding. Define data in the Data tab, bind it here, and the UI updates whenever the data does.
Components
Put a view on a Screen, add a few components inside it, then select the view again. The first section of the view inspector, Info, has a Create Component button.
Press it and the view is registered as a custom component you can reuse for the rest of the design. Editing a custom component updates every place it's used, and each use can still override almost any property.
That's the core of designing in Layerz. The details are a post of their own.
Design System
Reusing custom components gets you most of the way to a design system on its own. But colors, fonts, and other values need somewhere to live, so there's a Design System tab for them. Colors and fonts today, with more to come.
The part that matters most: the design system is how Layerz supports themes. Make as many as you like, and apply any of them mid-design to compare conditions live.
Assets
Anything the app displays needs managing somewhere, and this is it. Every image you plan to use lives here and gets pulled in as you design. Images, video, audio, Lottie, and filters in one place.
Images, video, audio, and Lottie are assigned to the matching view type as you lay out the UI.
Filters apply effects to an image. You can attach one to an image view or a camera view, and a filter is built as a chain of effects — which is to say there's no practical limit to what you can make.
Data
Design in any tool starts on an empty canvas. What turns that design into an app is data. Managing data that changes, and binding it to the UI, is what makes the thing real.
Data is modeled in JSON, the structure everyone already knows. Defining it is straightforward: give it a name and a type. An object type defines its own list of fields. Mark it as an array and you get a list of that type.
Then you bind it. Select a component in the Screen editor, look at the inspector, and every row with an orange + button can take data. Press it, pick from the data you've defined, done.
The data now shows up in the UI — and components a person can change, like a text field or a toggle, update the data back.
Data Schema
Data covers the basic types — strings, numbers, booleans. On top of those you can define reusable types as a Data Schema.
A contact is the easy example: create a schema, add fields for name, phone number, and address, and you can then use that schema as a type in Data. A schema stays editable after you've defined it.
API
The liveliest data comes from an API. This tab handles one job: defining the API. What you define here gets called from an Action Flow, which updates your data.
Managing APIs is usually tedious work, but you can import an OpenAPI spec as-is, which takes most of it away.
Services
The parts of an app that aren't UI. Right now: Timer, Battery, Connectivity, and Audio.
Action Flows
If Data supplies the real content, an Action Flow is what does something with it. It also drives the app itself — pushing from one Screen to another, showing an alert, and calling an API to update your data.
There's a long list of actions, and you arrange them in the order you want to get the behavior you want. An Action Flow runs off user interaction as its trigger: a button press that pushes the next Screen, or entering a Screen and automatically calling an API to fill it.
Wrapping up
That's a first look at Layerz App Designer. Layerz reaches into a lot of what iOS can do, with the goal that anyone can build a real, dependable app without writing code — and there's more coming.
Go design the app you want.